Web
Analytics
News - Concrete Sleepers Sydney

News

How To Maintain Pavers For A Long Time
Construction Consultant, House Renovation

Pavers: How To Maintain Them For A Long Time

Did you know that pavers have been used for thousands of years, dating back to the Roman Empire?

Pavers have come a long way since then, but the idea remains the same. Pavers are made of stones such as brick, stones, tiles or brick-like concrete. There are four main materials that pavers are made of and these are, concrete, clay, natural stone, and brick. Pavers are most commonly used in walkways, driveways, and pathways. Below is more information on pavers and how you can maintain them.

More about Pavers and their uses

One of the reasons why pavers are so popular is the fact that they come in an endless selection of styles, colours, textures, patterns and sizes. Natural stone pavers can be made from travertine, basalt, cobblestone, slate and granite. Hardscape paving stones can be used for patios, pool decks, outdoor foyers and outdoor kitchen grills as well as other outdoor seating areas.

There are many benefits to having paver hardscaping. Pavers require little upkeep and are eco-friendly. They are non-slip and provide secure outdoor flooring which can be replaced at a low cost if one is damaged. Pavers are also durable and last for a long time. You can customize pavers so that you get the look and layout that best suits you. Homeowners can use pavers to add value to their homes in the event of a sale.

Can Pavers be painted or laid on grass?

A lot of people want to know, can pavers be painted, and can you lay pavers on grass? The answer is yes on both counts but there are certain considerations to be made beforehand. Pavers must be laid on the grass in a way that keeps the stone stable and in place. After being laid you must still be able to easily mow and trim around the pavers. Brick pavers can be painted to make them more stain-resistant after they have been sealed.

How to maintain Pavers

If you know how to clean pavers can keep them looking new and prevent damage. The main components of paver maintenance are cleaning, weed control and sealing. In order to control weed growth, fill the cracks with polymeric sand which will prevent weeds from growing. Dirt and debris must be swept off regularly so that the pavers do not stain. You can spray your pavers with a hose to wash the grime away. A mild detergent can be used to scrub stains off and every two to three years, you can apply a sealant to protect the pavers.

How much do Pavers cost

There are many factors that affect the cost of pavers. They type of paving and its design will determine how much you will pay. If there are special requirements such as borders or if the surface you want to pave is uneven, this will also affect the price. In order to get a good deal on pavers, use a reliable service provider.

At Concrete Sleepers Sydney we have a team of pavers with extensive experience in home upgrades. Contact us for more details.

Here are some Great Garden Wall Ideas you can use.

concrete sleepers retaining wall
Construction Consultant, Architecture & Building

How To Select Stylish Outdoor Flooring On A Budget

Outdoor flooring is often overlooked but it is as important as choosing outdoor furniture. The right flooring will have a considerable influence on your outdoor experience. There are many options available even on a budget and with the right planning, you can get the best flooring without breaking the bank. Pavers and outdoor floor tiles are a great example of outdoor flooring that you can get on a budget. Read on to find out more outdoor flooring ideas.

Decide on a suitable budget

The best flooring for outdoor patios is going to cost quite a bit. You need to decide how much you are willing to spend and then look for the best options that fit your budget. Budget options include composite flooring, outdoor pavers, and concrete flooring. When choosing which type of flooring you will opt for, take time to weigh the pros and cons. There are many online resources available that list the benefits of different types of the outdoor flooring and what to look out for when buying outdoor tiling.

Composite Flooring

A lot of people love how real wood looks like outside flooring. Not everyone can afford to have real wood and composite flooring is a great alternative that is budget-friendly. Composite Wood tiles can make a deck look polished and modern just like real wood without the extra cost and installation hassle. Unlike real wood, composite flooring is easy to maintain and made to be fire-resistant so that makes it a safer option for families.

Brick Pavers

This timeless outdoor flooring has made many homes look beautiful for a long time. There are many options when it comes to colors and patterns that you can choose from. Brick pavers are very durable and as such will pay for themselves over the long term. They do not need a lot of upkeep and need not be replaced often. As a budget option, this may be a reach but the longevity of brick paving makes it an option worth considering.

Concrete flooring

Last but not least on our list is concrete outdoor flooring. There is the expression, ‘as hard as concrete’ and it is ever so true. After it has been laid, concrete is very hard to destroy so it will last a very long time. If you do not like the natural look of concrete, there’s always the option of staining it or stamping it to make it more stylish. This is probably the cheapest outdoor flooring option but with the right furniture and styling, you can make your outdoor patio look great.

At Concrete Sleepers Sydney we have a team of pavers with extensive experience in home upgrades. Contact us for more details.
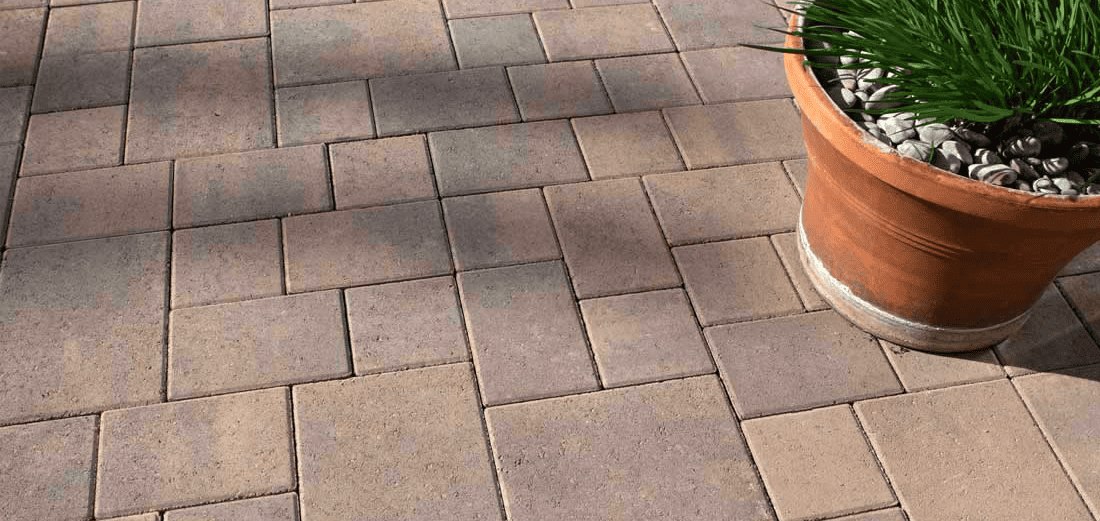
If you are looking for more home outdoor improvement ideas, here are some Stepping Ideas For Your Home.

concrete sleepers retaining wall
Construction Consultant

Step By Step Guide To Building A Stairway With Retaining Wall.

Do you know what the best addition to your retaining wall will be?

A stairwell. It will make your garden more visually stunning. Stair designs can be straight or curved depending on how much space you have available and what effect you want the stairway to have. More complex designs will require you to get a professional involved, but you can still be involved in every step of the building process. Read on to find out how to build a retaining wall with steps.

1. Prepare for the project

If you want to build a retaining wall step by step, you must have a clear plan before you start the project. Careful planning, an eye for detail and the ability to be flexible are key to completing a quality project. Decide what material you want to use for the stairwell. Some people opt for wooden stairs on a stone retaining wall and others use bricks. Take the time to get the right material for you and find out how much it will cost. It is also important to learn what you will need to do to keep the stairway material looking its best.

2. How to build a retaining wall with steps.

This is the more technical bit. Measure out your slope and choose a stair layout design that goes with the normal grade of your slope. On a sketch, mark out the stair riser locations and use the sketch to calculate how many steps you will want. Excavate the stairway location and remove as much soil as you need to leave it level. You can build-up the stairway from the ground up. If you happen to remove more soil than necessary, you can replace it with wall rock when you start building.

When the base is ready, it is now time to lay the base course (this is a layer of material that is located under the surface layer which gives strength to a structure). Make sure there are no empty gaps which will be potential areas of weakness. You can then install the first stair riser. To ensure that the stairway is level with the wall it is built-in, use a block on the wall as a reference and use it to level the stair treads. Compact the level and you can then add more steps.

Repeat the steps above for all the following stair risers and once this is done, install your chosen stair tread material to give your stairway that final finish.

At Concrete Sleepers we have a qualified team that specialises in building and waterproofing retaining walls. Contact us and we will build a beautiful staircase in your retaining wall.

How To Waterproof A Retaining Wall
Construction Consultant

How To Waterproof A Retaining Wall

A lot of people don’t know how to waterproof a retaining wall?

A lot of people don’t know how to go about this. A retaining wall holds earth to one side when there is a radical change in elevation. It prevents soil from spilling to lower levels and controls soil erosion so that there are no landslips. Smaller retaining walls can be done DIY but for more complex ones you will need a professional to ensure it is done right. If you plan to have one and want to know how you can waterproof it, read on to find out more.

1. Prepare for the project

It is important to be organised when building and waterproofing a retaining wall. If not done well a retaining walls can be hazardous. Depending on the size of the project to undertake, you may need to get council permission and builders warranty insurance. Check the area you plan to dig your foundation for underground plumbing and electrical cables, so you don’t disrupt them. If you plan to have large trees supported by the retaining wall, consult a construction engineer.

2. Get the right waterproofing supplies

Bricks, concrete blocks and masonry are porous and will allow moisture to penetrate from surrounding soil into the wall. A strong retaining wall needs to be waterproofed so that hydrostatic pressure build-up can be minimised, and the wall can remain strong for many years. You need to buy good waterproofing products and not damp-proof products. These may seem interchangeable, but this is not so, damp-proof products do not last as long and will eventually allow leaks.

3. Choose a good Liquid Rubber Membrane

Liquid Rubber Membranes are eco-friendly waterproofing membranes that are used to waterproof retaining walls. They come as paints, are quick to apply to a wall and have excellent flexibility to allow for soil movement within the wall without cracking and letting water through. The flexibility of the Liquid Rubber Membrane will allow the membrane to stretch with structural movements of the wall. The product you choose MUST be capable of withstanding water that is stagnant. Check with your supplier that it meets this requirement.

4. Apply the Liquid Rubber Paint

Liquid Rubber Paint can easily be applied to any retaining wall and it takes a few hours to complete the job. You will need a brush to apply the paint or a trowel. Get the first coat done and let it dry then put a second coat. Make sure that gravel and other sharp materials do not damage the membrane during backfill. You can use a permanent protection sheet for this.

At Concrete Sleepers we have a qualified team that specialises in building and waterproofing retaining walls. Contact us and we will help you build or waterproof your retaining wall.

how to make cement sleepers
HOW TO MAKE CEMENT SLEEPERS

How to Make Cement Sleepers

Do you want to know more about cement sleepers?

Making a decision on sleepers for your retaining wall is simple, especially if you want peace of mind that your wall will still look great ten years from now and that you are getting real value for your money. Cement sleepers are easy to install and there is little maintenance involved. Here is what you need to know about how to make cement sleepers.

  1. What is a cement sleeper?

    A cement sleeper is a kind of railway sleeper or railroad tie made of steel-reinforced concrete. With the characteristics of water, heat, and corrosion resistance, cement sleepers have been widely used all over the world since 1950.

  2. Why cement sleepers?

    Because of their low cost, high durability, and ease in construction and maintenance, cement sleepers will continue to be the popular components in modern construction systems. Using cement sleepers is environmentally friendly as cement can be recycled at the end while expansion and contraction with temperature changes is minimal.
    Cement sleepers are available in a range of colours and finishes to suit your style and there is minimal maintenance required to keep your retaining wall looking good. They are not affected by insect and termite attacks and do not rot. Cement sleepers do not split, warp, crack, expand, or shrink and are highly compatible with the underlying soil and rocks.
    The fire resistance of cement sleepers is outstanding, they do not burn. Due to the composition of material, cement sleepers have very good insulation and are therefore suitable for use in track circuited lines.

  3. Making cement sleepers

    The recipe for the cement mix is 6 parts fine gravel, 4 parts sand and 2½ parts cement. After deciding on the basic design and dimensions of the cement sleeper, you need to make a metal mould. You can make a mould from 3mm galvanised steel plate. It is essential that the sides and ends of the mould are slightly tapered to allow removal of the completed sleeper after the concrete sets.
    Reinforcement bar (or ‘reo’ for short) is also required to both strengthen the sleeper, and to accurately position the rails. The reo assembly is bolted into the mould and the rail securing bolts are used to position and hold the assembly in place during pouring.
    The nuts seal the holes to prevent leakage of the wet cement. It is very important that a release agent be painted onto the mould internal surfaces prior to pouring, in order to get the completed sleeper out.

Looking for quality cement sleepers and more?

Contact Concrete Sleepers Sydney today, your one-stop shop for cement sleepers and retaining walls. We are the leading supplier of garden step kits, retaining walls, and cement sleepers of all kinds. We have several years of experience working with concrete sleepers and retaining walls, providing low-cost, affordable, quality concrete retaining walls to our customers.